Welcome back to another installment of painting guides to tabletop standard for your minis!
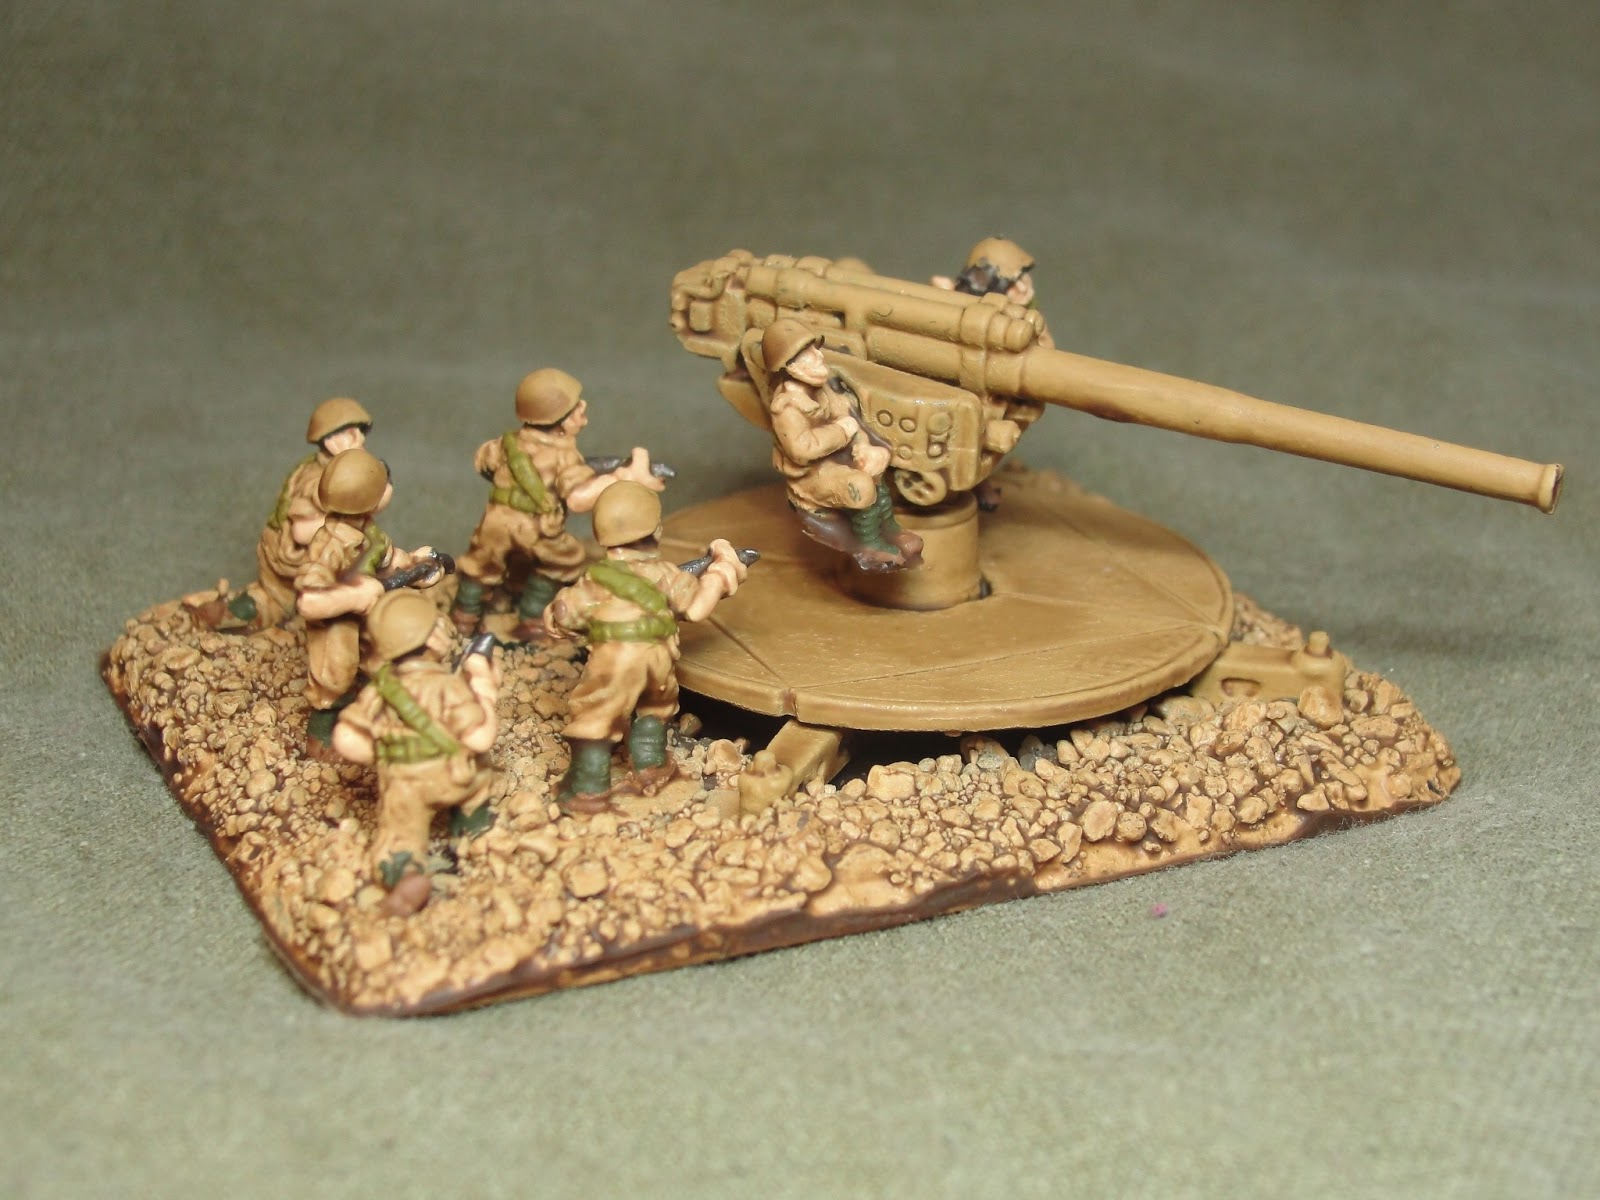
Today I am showing the Lancia (Coolest model in Flames of War) and the 90/53 gun (the useful version of the Lancia). I must admit these models were a very quick paint and man are they fun to work with!


Assembly
Assembly
I assemble all of my minis using loctite control gel. I have found that this product is more shock resistant than other glues, and the gel form that it comes in ensures ample amounts of glue end up in the right places to hold the models together.
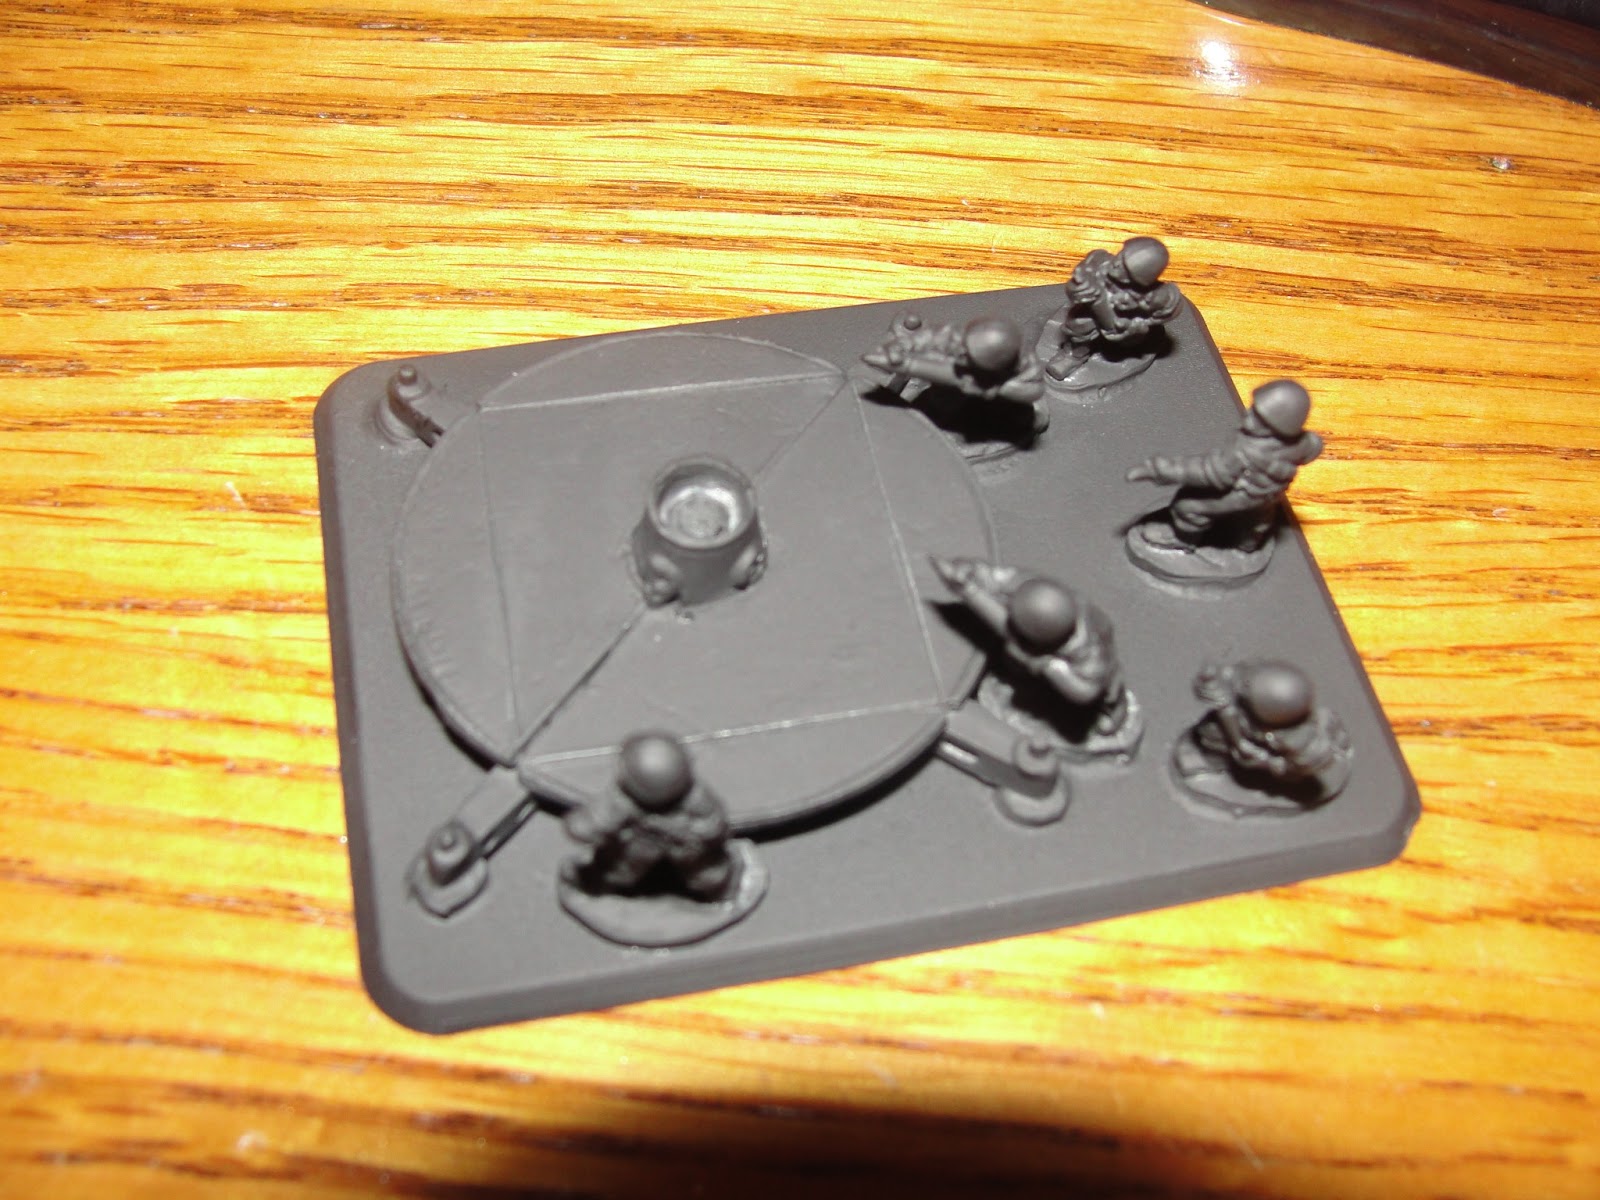
With these models you can see that I placed a 1/8"x1/32" magnet from K&J Magnetics Grade N52 to the bottom of the gun and in the base where the gun sits. This allows the gun to freely rotate!
It's not necessary for game play but it sure is fun and cool!
 Priming
I prime my models using P3 Black primer after they are fully assembled and based. This is my method, it does not have to be yours. I know a lot of you prefer to paint all of the separate components before attaching them to the base.
Here are a couple of pics showing the 90/53 primed. You should be able to see the magnets glued to the gun and the base also in the pictures.

Basing
Next I smeared the base with DAP wallboard joint compound, and immediately buried them into play sand to add texture to the basing.


This was the end result. I let the joint compound dry for 24 hours before continuing.

I then progressed to paint the Miniatures.
I use Vallejo paints. You do not have to use the Flames of War branded Vallejo paints, they are exactly the same as any other Vallejo paint with a different label. The paint numbers are all the same.
(977) Desert Yellow--ground color and Italian uniforms.
(914) Green Ochre--Gun, vehicle, helmets, and turntable .
(881) Yellow Green--Uniform straps and webbing.
(955) Flat Flesh--Faces and hands.
(863) Gunmetal Grey--Artillery shells.
(875) Beige Brown--boots.
(888) Olive Grey--putees .
I let the paint dry for 24 hours.
My next step was to dip the miniatures in Minwax Polyshades Royal Walnut. You can use satin or gloss, both are shiny and will need a coat of dullcote.

After 24 Hours of curing I flip the minis upside down to let the bottoms cure also.


Notice how shiny all of the pieces are......but this is easily fixed.
Finally it is time for the finishing touch. DULLCOTE!!!

Just remember you can always go back and drybrush or paint the faces on the guys after these steps. This not only gives your minis a great tabletop look but also protects them from handling and play!
Other than adding static grass or other terrain features.......
Play!!
Happy Wargaming!!
-PPS


No comments:
Post a Comment
Please be cordial!